The AVS Rain Gaurd system is a little different than your average window deflecter, instead of an outside adhesive system this system is an inchannel mount. In our oppinion this technology gives the AVS's a unique but clean look.
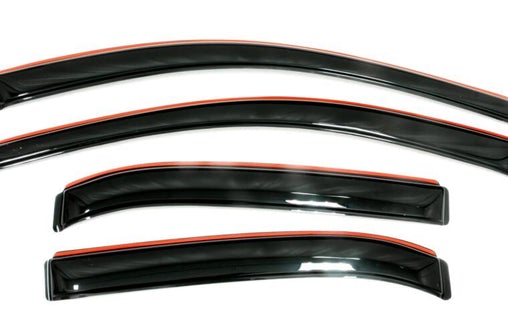
AVS Rain Guard Window Visors
AVS Rain Guard Window Visors
This video linked above is a full install video so feel free to give that a watch
but we will also go through the step by step install below.
Whats Included?
Included in the AVS Rain Guard Window Visor package:
- Driver's side rain guard both front and back window
- Passanger side rain gaurd both front and back window
- Multiple alcohol swabs
- Course fiber cloth
Step 1: Use the course fiber cloth to clean your window channels
if you have questions see time stamp 0:30
Step 2: Use the alcohol swabs to make sure your window channels are as clean as possible.
Step 3: We decided to start with the driver side window first but feel free to start wherever, the steps will remain the same.
For this step first check the fit of your rain gaurds by placing them in the window channel. After youve determined its a clean snug fit remove the red 3mm tape and again place into your window channel.
Once in place apply pressure to the inside making sure that the adhesive is doing its job.
Step 4: Repeat steps 1-3 for each window
Final Thoughts
AVS Rain Guard Window Visor gives some great bonuses to your vehicle. A couple key points to mention with this system they give an added security by allowing you to crack windows for pets or if you just want to be able to drive during some inclement weather. Another benefit is these will effectively cut out that annoying helicopter thumping that accures while driving at high speeds.
Not necessarily a negative but something to note, if you watched the video you may already know what it is im going to say but be aware of temperature when installing. We ran into a minor issue with the adhesive not having a solid contact, like us if it's cold where you are we recommend using a heat gun or even a blow dryer to help warm up that adhesive and hopefully provide a better contact.
Leave a comment